We answer the most frequently asked questions about sealant for your tubeless tires. You’ll want to read this!

Using a tubeless system on your bike wheels often means drastically reducing the chances of facing that annoying situation where you get a flat mid-ride, forcing you to stop and repair the puncture, change the inner tube, or worse cut your ride short because you’re out of spares or not confident enough to fix it on the spot.

Setting up your bike wheels tubeless, as you’ve probably already discovered, is a practical, affordable, and fairly simple way to avoid punctures. It’s especially recommended if you ride mountain bikes and is an increasingly popular practice in this discipline. Of course, this doesn’t mean it’s the best option for everyone depending on your experience and needs, you might prefer the traditional inner tube system or choose to use tubeless sealant. The choice is yours!

If you’ve decided to go tubeless or are considering it, you should know that this system requires special maintenance, and there are a few important things you need to keep in mind to ensure it works properly and stays effective. Let’s answer some key questions...

But first, take a look at this video by Jose María López, where he clearly explains what a tubeless system is and how the sealant works.

How long does tubeless sealant last?

While it depends on various factors such as the brand of sealant, how often you ride, and the time of year, the general recommendation for normal bike use is to replace your tubeless sealant approximately every 3 months.

But be careful just because the recommendation is every 3 months for regular riding doesn’t mean that if you’re not riding, the sealant will remain effective. If your bike sits unused for a while and your wheels are set up tubeless, one of the first things you should do when getting it ready again is to change the sealant. Why? It’s simple without regular movement, the sealant tends to settle at the bottom and can dry out, losing all its effectiveness.

Another reason to replace your tubeless sealant sooner than usual is temperature. In summer, with hot and dry conditions, the sealant dries out faster, so it’s best to change it more frequently. In other words, if you ride during the summer months, replacing the sealant every 6 to 8 weeks would be ideal.

How can you tell what condition your tubeless system is in?

To know whether it’s time to replace your sealant and to check the condition of your tubeless system first-hand, you can perform a simple check. While it’s a straightforward process, it should be done carefully. Here’s how:

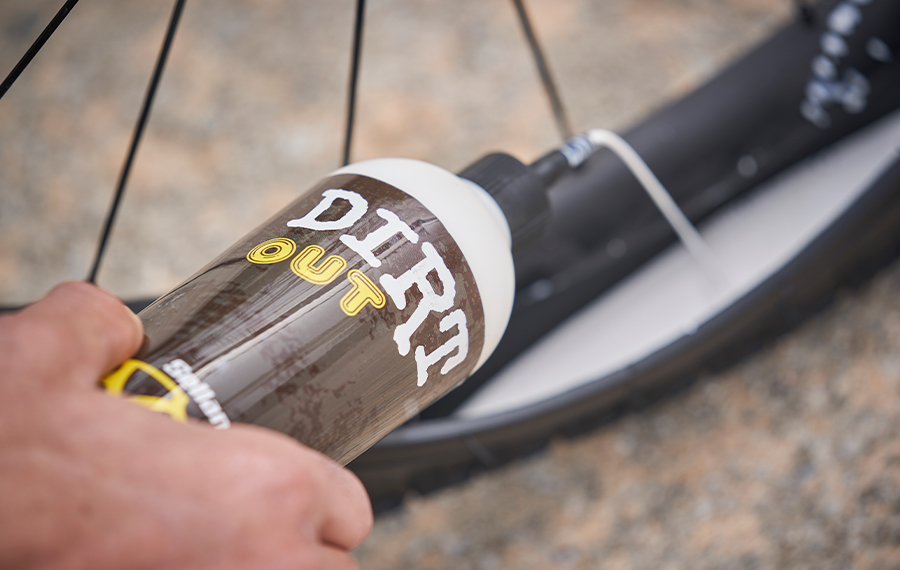
First, fully deflate the tire so there is no air left inside. Then, using a dedicated clés de valve presta, remove the valve core. The valve core is the removable part of the valve. Attention! When performing this step, make sure the valve is at the bottom of the wheel with the opening facing upward to avoid any sealant spilling out when you remove the valve core. The easiest option is to use a valve accesories, which makes the job much easier and allows you to add sealant more conveniently.

Once the valve core is removed, you can insert a syringe into the valve to extract the sealant from inside the tire. Thanks to the marked scale on the syringe, in milliliters, you’ll be able to check how much sealant is left. How? If you ride mountain bikes with 29-inch wheels, the recommended amount is between 80 and 100 ml per tire. For 27.5-inch wheels, the recommended amount is roughly 20 ml less. For road cycling, you should aim for between 40 and 60 ml per tire. If the amount is below these recommended levels, you should top it up accordingly.

But that’s not all your inspection can go a step further with another key check: the color of the sealant. This will help you determine its condition. If the sealant is darker than it was originally, or if you notice solid fragments or dry patches, it’s time to completely replace the sealant, as it will no longer be effective.

tubeless sealant mtb

How do you change tubeless sealant?

When it’s time to change the sealant whether because the recommended interval has passed or because, after checking, you’ve realized it’s necessary the process can seem a bit tricky and messy. Not everyone has the same skills or enthusiasm for playing “bike mechanic,” so quite often, out of laziness or lack of information, it’s easy to keep putting it off. But the downside is that this will only make your tubeless system less effective, and sooner or later you’ll be dealing with an unexpected flat.

Of course, having a mechanic do the job is the easiest option you won’t have to deal with it yourself. But the truth is, it’s a simple task that you can do on your own quickly, easily, and at a lower cost if you know the right steps and follow a few helpful tips. Want to know how? Read on!

tubeless tire sealant mtb

1. Remove all the tubeless sealant

First of all, you need to remove all the tubeless sealant remaining inside the tire. You can do this using a syringe until you see that no more sealant is coming out.

2. Clean the tubeless tires of any leftover sealant

If you’re going to use the same sealant as last time, it’s not strictly necessary to do this step every time you change the sealant. However, it is a good idea to do it from time to time to prevent dry sealant from building up in certain areas or simply to keep your wheels clean and well maintained.

If you’re switching to a different sealant or using a product from another brand, you’ll need to remove the tire using detachable fibre so you can clean off any old, stuck-on sealant. You should do this with water and by gently scraping the residue away. Avoid using harsh cleaning products or abrasive sponges that could damage the tire casing. Water alone is enough to remove the old sealant and get the job done.

Why is this step important? To prevent any chemical reaction between the two different sealants, which could potentially degrade the tire prematurely.

3. Check that the tubeless rim tape is in good condition

Once the wheel is clean, check that the tubeless rim tape is in good condition and properly sealing the rim. If it isn’t, replace it to ensure your wheel is perfectly ready to roll.

4. Add the sealant through the tubeless valve

Once the inside of the tire is clean, add the sealant and reinstall the tire onto the rim using tire levers. If you haven’t removed the tire, you can add the sealant through the tubeless valve by removing the valve core and then reinstalling it afterward to close the valve. After that, inflate the tire until the beads seat properly on the rim, just as shown in the video by Jose María López, where he demonstrates step by step how to change a tubeless tire easily.

5. Spin the wheel to distribute the sealant evenly

Finally, here’s a step that might seem trivial but is actually very, very important. It would be a shame to go through the whole process and forget this simple yet highly effective step. Spin the wheel several times to make sure the sealant you just added is evenly distributed throughout the entire tire so it can provide full coverage where it’s needed.

We hope that after reading this article, you now feel more prepared to take on the maintenance that every tubeless tire system requires. It’s a highly effective setup, but without proper maintenance, it can lose its effectiveness partially or completely leaving you exposed to those dreaded punctures.

Always remember: maintaining your bike is essential. Give it the care it deserves!

#KeepOnCycling

Related products

Product added to wishlist