Do you use tubeless tires on your bike? Are you thinking about trying them out? Do you have questions about how they work and how to install them? Don’t worry in this second installment of the BiciLAB mechanics course, we’re going to cover all of that.

The second episode of the BiciLAB Mechanics Course with Eltin Cycling is here! If you watched the first video, you probably found it very useful, and we hope you’ve already put some of the tips into practice. If you haven’t seen it yet, don’t worry, here is the link so you can discover the 7 basic adjustments for your bike that BiciLAB introduced in the first installment.

This time it’s all about “tubeless”, a concept many people are familiar with or already use on their bikes, but which still raises questions and differing opinions—especially when it comes to its use and maintenance. Here you’ll find cyclists who prefer using inner tubes, others who have tried tubeless and made it their main ally against punctures, and those who haven’t taken a firm stance and alternate between the two to enjoy the advantages of each depending on the riding style or situation.

sistema tubeless bici

 Tubeless emerged as an evolution of the traditional inner tube system used to inflate tires. Or rather, more than an evolution, it represented the elimination of the inner tube itself, which is something different. It consists of having an airtight and well-sealed wheel—either by using rim tape or a rim already designed for tubelesspouring tubeless sealant inside the tire, which is responsible for fully sealing and preventing air leaks in case of a puncture, and fitting the tire so it can be inflated and properly seated on the rim. This has been a brief and general explanation of how the tubeless system works, which we already covered in this blog article: "Tubeless system: What do I need to convert my wheels to tubeless?" Although it may seem complicated, don’t worry, because the aim of this video from the BiciLAB mechanics course is precisely to explain step by step how to convert a wheel to tubeless easily, in a very visual and practical way. Check it out! And as always, to summarize and complete the topic, we highlight the key points in detail below.

What components are involved in converting a bicycle wheel to tubeless?

First, you need to know which components are involved and what you need to convert your bicycle wheels to tubeless:

  • Rim tape or tubeless tape: Tubeless tape is used to convert a rim into “tubeless ready,” meaning it’s prepared for tubeless setup. Its function is to seal the rim. It comes in various widths and sizes, so make sure to choose the one that fits your wheel. A useful recommendation is to select tape slightly wider than the rim’s internal width to better cover the sides and maximize sealing.
  • Tubeless valves: Since there is no inner tube, you’ll need special valves to inflate the tire and perform maintenance. We’ll go into more detail later.
  • Tubeless tires: To tubeless a wheel, it’s essential that the tire is “tubeless ready,” meaning it’s designed for tubeless use. Note: this doesn’t mean you can’t use it with a tube—tubeless tires can be used with a tube when needed. The same does not apply to tires that are not “tubeless ready,” which can only be used with inner tubes.
  • Tubeless sealant: Also known as sealant or anti-puncture fluid, this is what seals the tire quickly in case of a puncture.
  • A punch or screwdriver to make a hole in the tubeless tape for inserting the valve.
  • A floor pump or CO2 cartridges with adapter to inflate the tire and help seat the bead properly.
tubelizar rueda

Steps to convert a bicycle wheel to tubeless

Once you have everything you need to start converting a wheel to tubeless, it’s time to get to work.

1. Apply the tubeless tape or rim strip

Start by thoroughly covering the rim bed with the tubeless tape. This process will turn a regular bicycle rim into a “tubeless ready” rim, meaning it is prepared for tubeless setup. Nowadays, there are wheels with rims already designed for tubeless use, in which case applying tubeless tape is not necessary.

cinta tubeless

But now let’s start from scratch, assuming you have a standard wheel and need to apply the tape or rim strip to go tubeless. The first step would be to take the tubeless tape we’re going to use. Although it depends on the thickness of the tape itself, a good recommendation is to wrap the rim twice completely to ensure a proper seal. You can start from the opposite side of the valve and go around the wheel twice—two full wraps.

While applying the tubeless tape, it’s very important to keep it under tension so it adheres properly. At the same time, make sure it evenly covers the full width of the rim. Once you’ve done the two wraps, cut the tape with scissors and check that the starting and ending points are well sealed so that no sealant leaks through. Once everything is in place, go over it with

cinta tubeless

2. Install the tubeless valve on your wheel

To install the tubeless valve, first locate the hole designated for it and puncture the tubeless tape. It’s best to do this from the inside out, making sure not to tear beyond the space needed for the valve. Don’t worry about making the hole too large, as inserting the valve itself will finish opening up the necessary space.

valvula tubeless

You’ll notice that the valve usually comes with a lock ring and a rubber gasket. To insert it through the hole, you need to remove both parts and then place them back on the outside once the valve has been inserted. The rubber doesn’t play a major sealing role—it’s just a small aid—but the lock ring must be tightened well by hand to ensure the area is sealed. It’s advisable to do this by hand and not with tools, because if you ever need to switch to an inner tube during a ride, you might find it difficult to remove the valve if it’s too tight.

The upper part of the valve is the valve core, which contains the mechanism that allows air to enter and exit. In tubeless valves, the core is removable, so sealant can be added through the valve when needed. For this purpose, tubeless valves often come with a small tool that makes it easy to install and remove the core.

valvula tubeless

3. Install the tire and add the tubeless sealant.

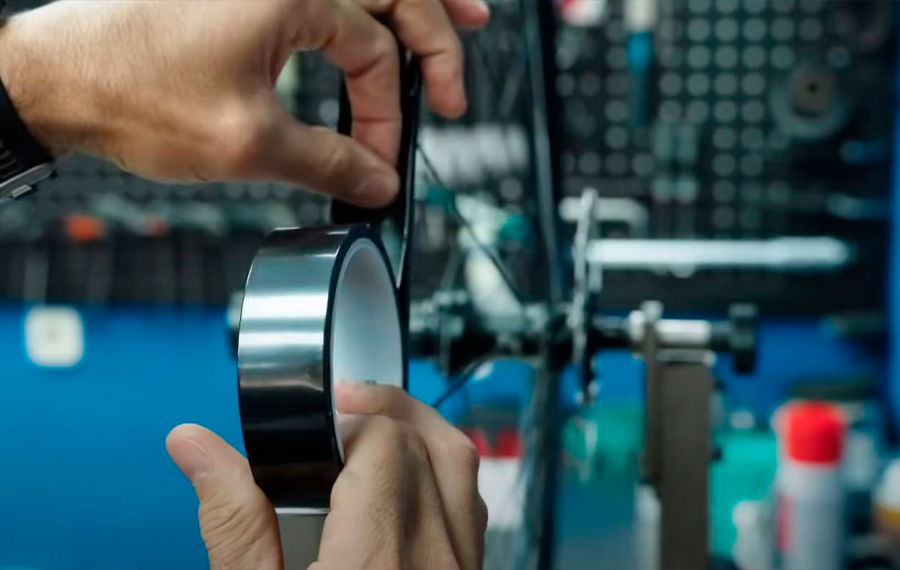
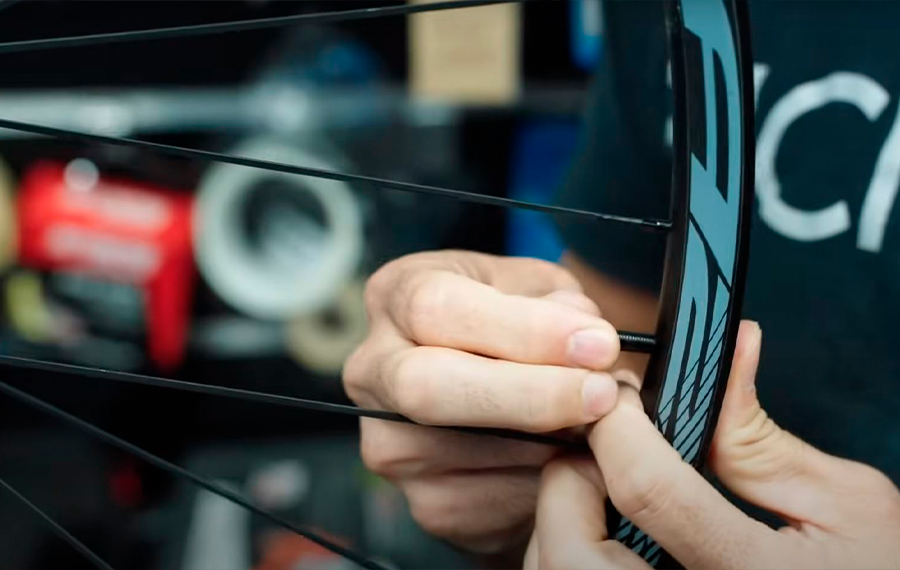
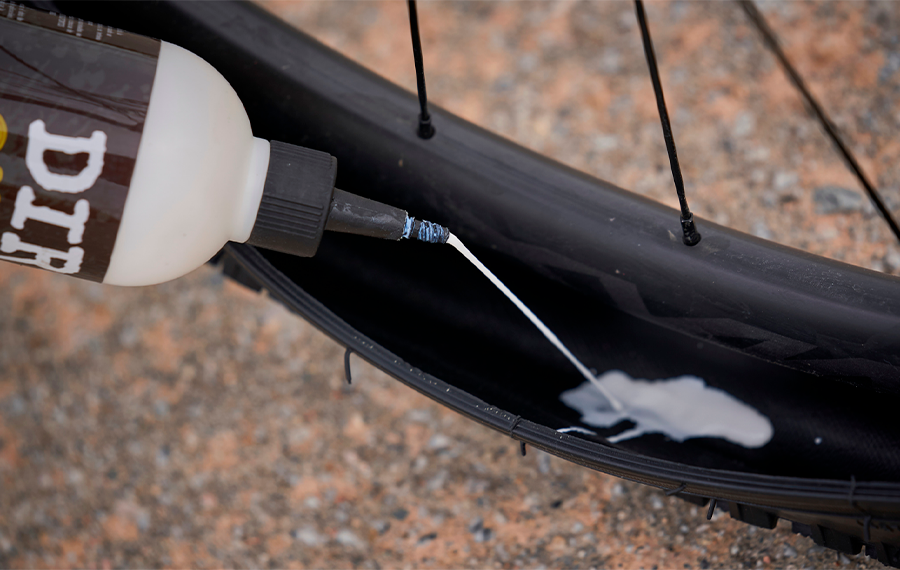
Once the tubeless tape or rim strip and the valve are in place, proceed to fit the tire on one side, leaving the other side open to add the sealant. This liquid, also known as tubeless sealant or anti-puncture fluid, is responsible for sealing the tire as soon as a puncture occurs and preventing the wheel from losing air.

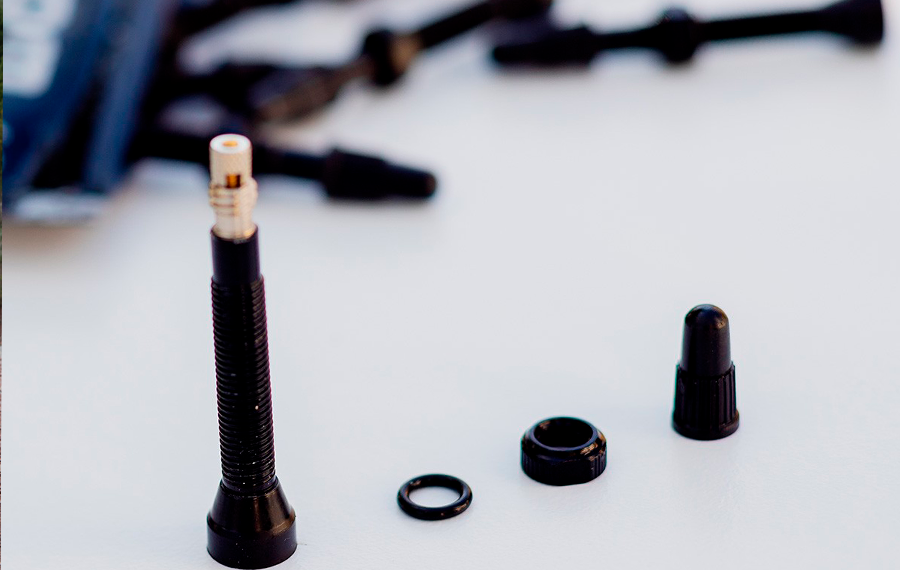
The sealant can be added directly inside the tire once one side is mounted, or through the valve without the core, as mentioned in the previous step, with the tire fully installed. The recommended method when converting a wheel to tubeless for the first time is to pour the sealant into the partially mounted tire. Then, for maintenance and periodic refills, it can be added through the valve. However, if the tire is very difficult to seat, it might be better to install it first without the mess of the liquid and add the sealant through the valve once the tire is seated. You can do it whichever way works best for you.

A very common question is how much tubeless sealant to use per wheel. It depends on the type and size of the wheel, but in general, for a 29’’ MTB wheel with 2.20–2.25 width, the recommended amount is 100–120 ml for a full refill.

Once the sealant has been added, finish mounting the tire onto the entire wheel. You can do this with your hands, if possible, or with the help of tire levers. If you find it difficult to fit the tire at certain points, try unseating the bead and pushing it toward the center of the rim on the opposite side to reduce tension, which will help you get the tire fully inside the rim.

cubierta tubeless

4. Seat the tire on your bicycle rim.

To properly seat the tire, you need to inflate it until you hear the popping sounds that indicate the bead is locking into place at different points. This can be done with a floor pump, always checking with a pressure gauge to ensure the pressure is correct, or more easily, with CO2 cartridges, which inflate the wheel in just a few seconds. A common mistake is to overinflate the tire in an attempt to get it to seat better. While it’s true that the bead seats with air volume, it’s important not to exceed the recommended pressure, as doing so won’t help and could actually cause the tire to burst.

sistema tubeless

Once you’ve inflated the wheel and believe the tire is seated, carefully check the bead line to ensure it has seated correctly and there are no air leaks. After that, bounce the wheel and spin it so the sealant spreads evenly throughout the tire.

And with that, your wheel will be ready to mount on the bike and you can start enjoying the advantages of tubeless. You’ll avoid many punctures and unnecessary mechanical interventions, but make sure to perform proper maintenance by renewing the sealant regularly and topping it up when needed.

sistema tubeless

Tubeless System Maintenance

To begin with, it’s important to know that the tubeless system is suitable for regular and frequent use of the bicycle. A bike with a tubeless system that sits unused for a long time will cause the sealant to accumulate in one spot and dry out, losing all of its properties.

The tubeless system requires proper maintenance to function correctly. Mainly because it handles puncture repairs, the sealant gradually gets used up and deteriorates over time, so it’s advisable to top it up approximately every 2 months. The easiest way to do this, as already mentioned, is to remove the valve core and add the sealant through the valve. Additionally, every 6 months it is recommended to repeat the entire process to thoroughly clean the wheel and fully replace the sealant. Keep in mind that factors such as heat and the number of kilometers you ride can cause the sealant to degrade more quickly, so during warmer months and periods of heavy use, it’s advisable to shorten these maintenance intervals.

obus desmontable

We hope all this information is very helpful when it comes to converting your wheels to tubeless. If you want to learn more about the different components involved in a tubeless setup, how they work, and how to maintain them, we recommend taking a look at the article: Tubeless system: What do I need to convert my wheels to tubeless?.

This concludes the second installment of the BiciLAB and Eltin Cycling mechanics course. Stay tuned!

#KeepOnCycling

Product added to wishlist